> ## Documentation Index
> Fetch the complete documentation index at: https://learn.cleftnotes.com/llms.txt
> Use this file to discover all available pages before exploring further.
# Creating Notes
> Voice and text, two ways to create notes in Cleft
## Voice Notes
Capture your thoughts instantly. Tap record, see your words. Minimal loading time thanks to our optimized Whisper model.
### Starting a Recording
1. **Tap the microphone icon** to begin recording
2. **Choose a note style** if you want this note to use a different format
3. **Speak clearly** into your device microphone
4. **Continue speaking** - Cleft will capture everything
Position your device's microphone toward your mouth for best audio quality
### During Recording
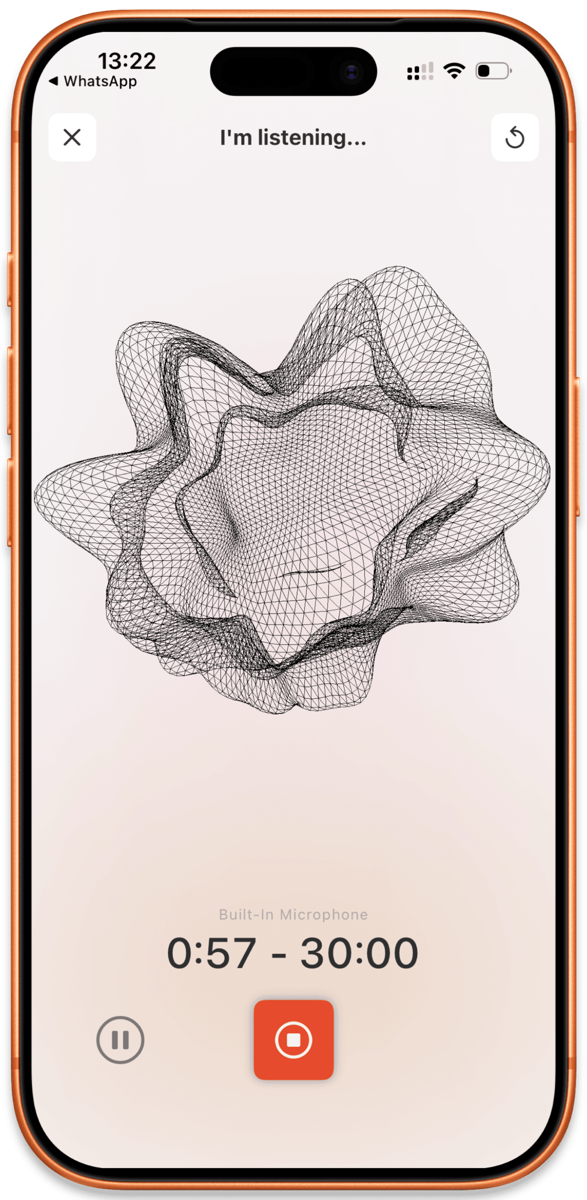 * **Pause recording** by tapping the pause button
* **Resume recording** by tapping the microphone again
* **Restart your note** by tapping the restart button, discards the current recording and starts fresh without leaving the recording screen
* **Cancel recording** by tapping the X, exits without saving
* **Monitor recording time** in the interface
* **Choose a note style** before you start, including Structured, Structured Prose, Clean Transcript, or a synced custom style
### Stopping a Recording
1. **Tap the stop button** when finished
2. Cleft transcribes your audio locally on your device
3. The transcript is then summarized to create your finished note
4. Your note appears, ready to edit, share, or export
See [Writing Style](/user-guides/custom-instructions) to set the default style, add Your Rules, or create custom styles with Cleft Plus.
See [Transcripts](/user-guides/transcripts) to view or edit the raw text.
### Audio Devices
Cleft works seamlessly with your audio devices.
#### Switch Devices Mid-Recording
On Mac, you can manually switch between audio devices at any time, even mid-recording. Cleft handles the transition without losing your recording. On iPhone and iPad, iOS routes audio automatically based on your connected devices.
* **AirPods / AirPods Pro.** Automatic detection when connected
* **Bluetooth headsets.** Full support for calls and recording
* **Built-in microphone.** Always available as fallback
* **Wired headphones.** Detected when plugged in
Your preferred audio device "just works". Cleft remembers your last choice and uses it automatically.
#### Other Apps Can Use Audio
FaceTime, Spotify, and other apps work while Cleft is open. You can:
* Listen to music while reviewing notes
* Take a call without closing Cleft
* Use other audio apps alongside recording
### Recording Tips
* **Speak at a moderate pace** for better transcription
* **Use quiet environments** for clearer audio
* **Pause between topics** to create natural breaks
* **Speak directly toward the microphone** for best results
* **Don't worry about silence.** Cleft filters out phantom transcription artifacts (like false "Thank you" at the end of recordings)
Your note is ready the moment you stop recording. Transcription runs in parallel while you speak, so there's no waiting.
## Text Notes
Can't speak? Type instead. Cleft processes text notes the same way.
Select (macOS) or long press (iOS/iPadOS) the `+` button and choose new text note (`⌘ + N`)
When you're done, select the Save button (`⌘ + ⏎`)
Keep Cleft open to process and create your note
Text notes are perfect for quiet environments like libraries or commuting, letting you quickly capture ideas when speaking isn't practical.
* **Pause recording** by tapping the pause button
* **Resume recording** by tapping the microphone again
* **Restart your note** by tapping the restart button, discards the current recording and starts fresh without leaving the recording screen
* **Cancel recording** by tapping the X, exits without saving
* **Monitor recording time** in the interface
* **Choose a note style** before you start, including Structured, Structured Prose, Clean Transcript, or a synced custom style
### Stopping a Recording
1. **Tap the stop button** when finished
2. Cleft transcribes your audio locally on your device
3. The transcript is then summarized to create your finished note
4. Your note appears, ready to edit, share, or export
See [Writing Style](/user-guides/custom-instructions) to set the default style, add Your Rules, or create custom styles with Cleft Plus.
See [Transcripts](/user-guides/transcripts) to view or edit the raw text.
### Audio Devices
Cleft works seamlessly with your audio devices.
#### Switch Devices Mid-Recording
On Mac, you can manually switch between audio devices at any time, even mid-recording. Cleft handles the transition without losing your recording. On iPhone and iPad, iOS routes audio automatically based on your connected devices.
* **AirPods / AirPods Pro.** Automatic detection when connected
* **Bluetooth headsets.** Full support for calls and recording
* **Built-in microphone.** Always available as fallback
* **Wired headphones.** Detected when plugged in
Your preferred audio device "just works". Cleft remembers your last choice and uses it automatically.
#### Other Apps Can Use Audio
FaceTime, Spotify, and other apps work while Cleft is open. You can:
* Listen to music while reviewing notes
* Take a call without closing Cleft
* Use other audio apps alongside recording
### Recording Tips
* **Speak at a moderate pace** for better transcription
* **Use quiet environments** for clearer audio
* **Pause between topics** to create natural breaks
* **Speak directly toward the microphone** for best results
* **Don't worry about silence.** Cleft filters out phantom transcription artifacts (like false "Thank you" at the end of recordings)
Your note is ready the moment you stop recording. Transcription runs in parallel while you speak, so there's no waiting.
## Text Notes
Can't speak? Type instead. Cleft processes text notes the same way.
Select (macOS) or long press (iOS/iPadOS) the `+` button and choose new text note (`⌘ + N`)
When you're done, select the Save button (`⌘ + ⏎`)
Keep Cleft open to process and create your note
Text notes are perfect for quiet environments like libraries or commuting, letting you quickly capture ideas when speaking isn't practical.