Some settings are Plus-only. Cleft syncs many preferences through iCloud, including theme, note style, copy format, note language, writing rules, Notion auto-send, and save-to-device choices. Folder permissions, device permissions, and first-launch Local Export consent are still configured per device.
Accessing Settings
- iOS / iPadOS
- macOS
Tap the menu button at the top left of your notes list, then tap Settings. With a left-hand layout, the menu button is on the right. On iPad it sits at the top of the sidebar.
iOS / iPadOS Settings
On iPhone and iPad, Settings lists each page by name. Each page holds the settings for one task.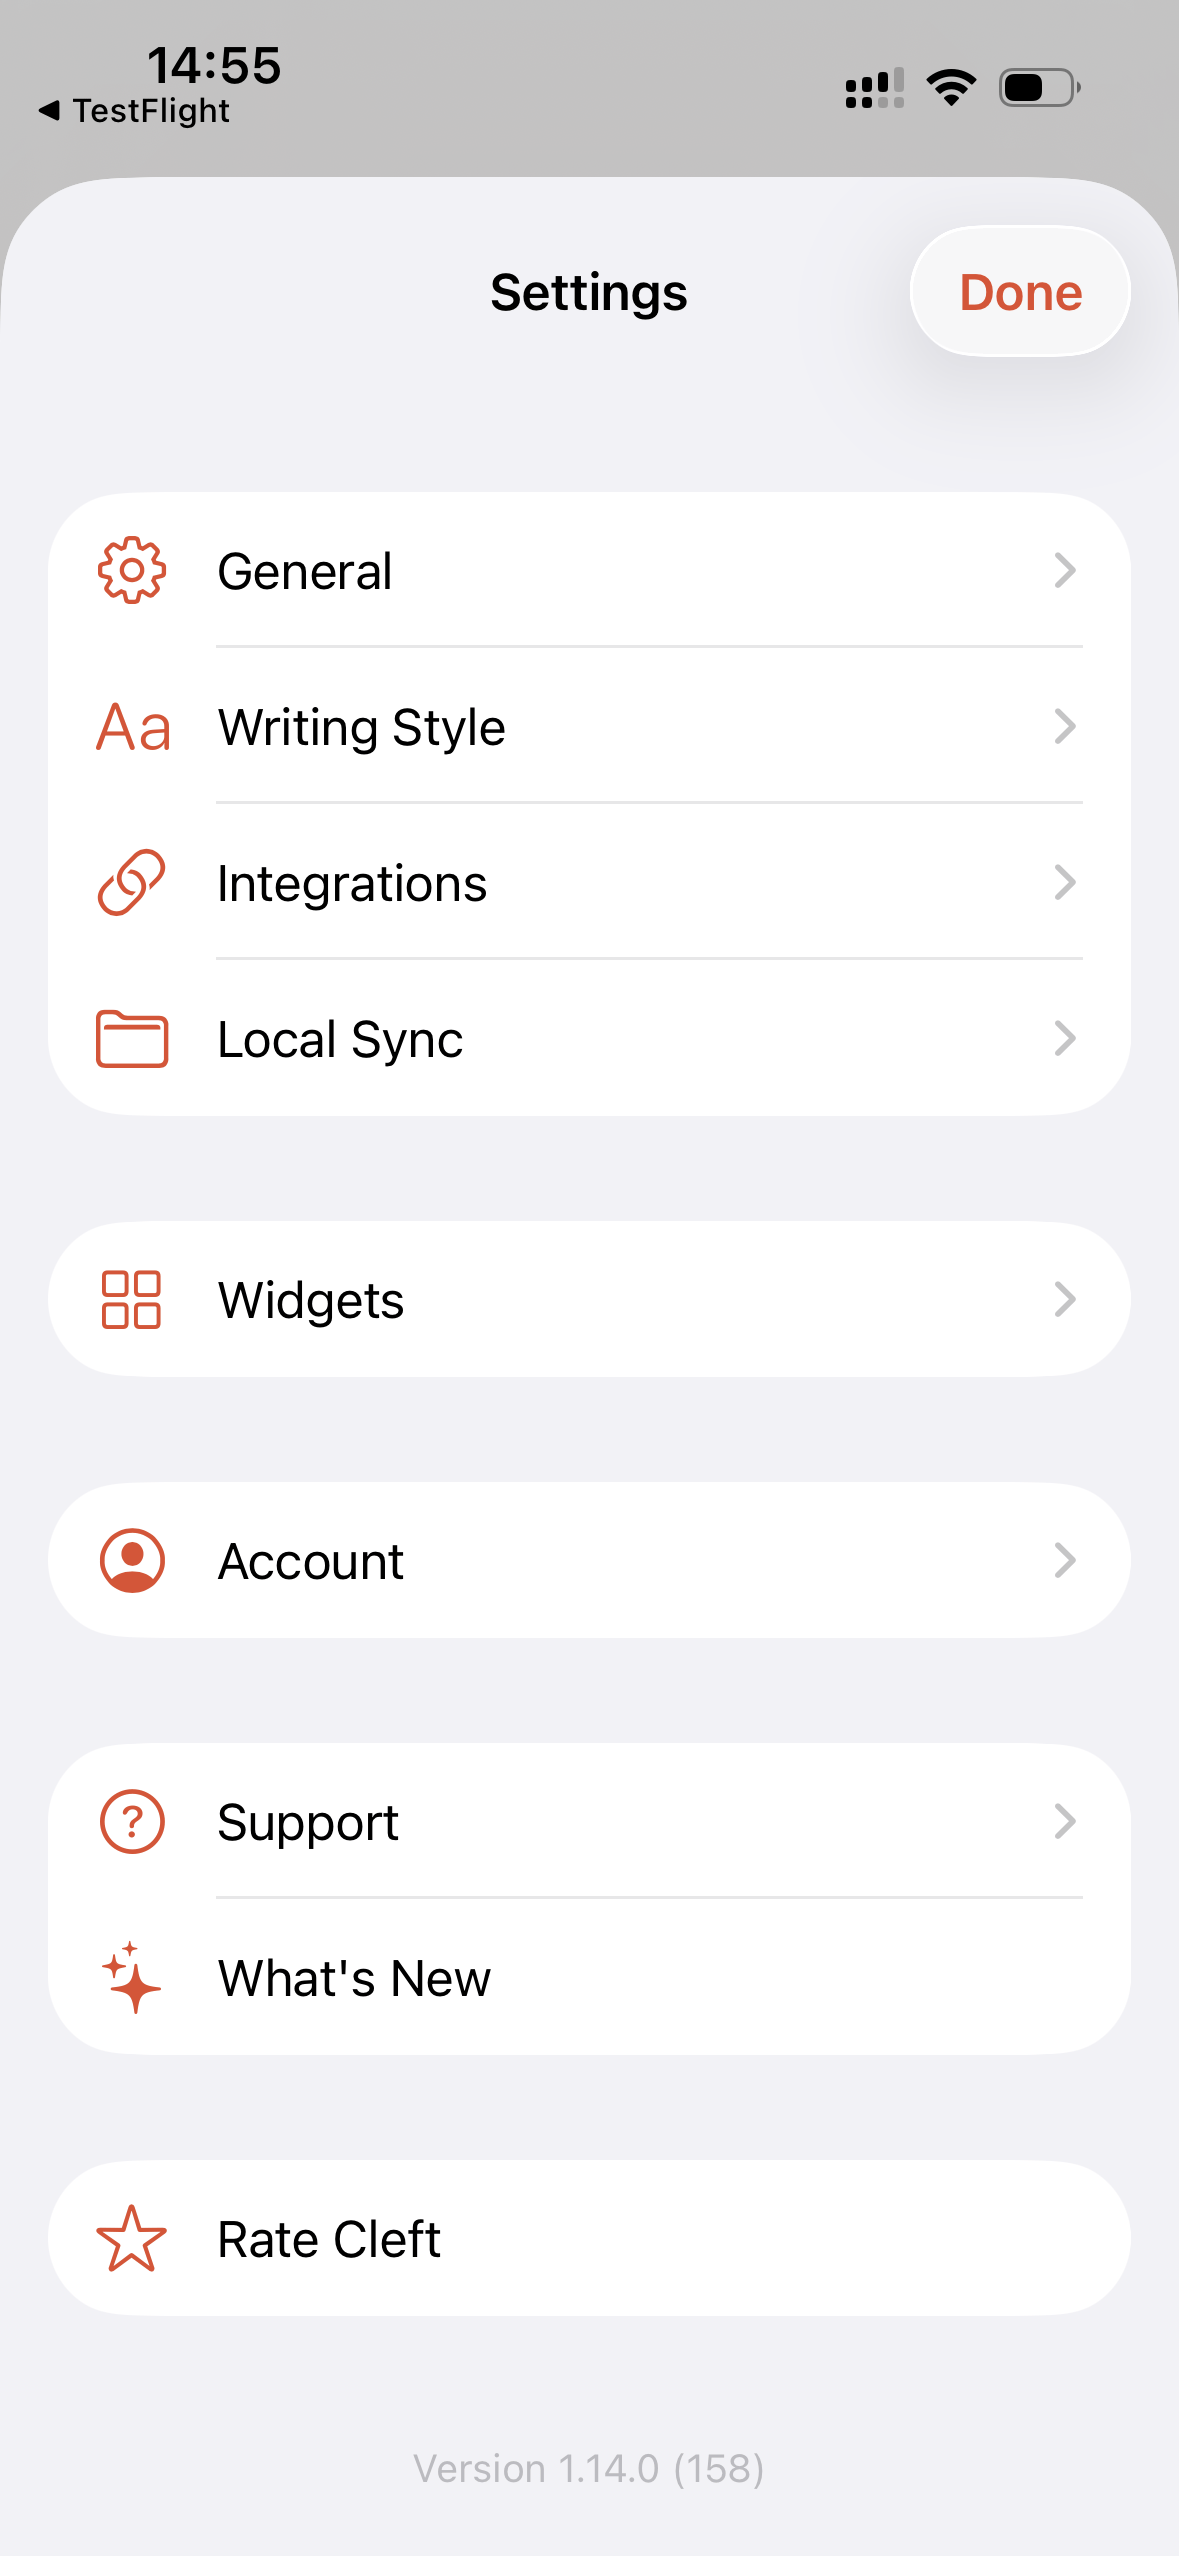
iPhone Settings
General
- Theme. Light, Dark, or System.
- Note view labels. The Notes and Transcript switcher shows Icons only by default. Choose Icons + labels to add its labels. Cleft still simplifies the note toolbar when space is tight, so every action stays within reach.
- Handedness. Choose Right hand or Left hand. See Handedness below.
- App Icon. With Plus, choose the colour of the Cleft icon on your Home Screen: Cleft, Cream & Chocolate, six classic colours or seven modern ones. Without Plus you see every colour with a lock. If Plus ends, the icon goes back to Cleft the next time you open the app.
- Date & Time. Choose how dates and times appear throughout the app.
- Keyboard Shortcuts (iPhone). See the shortcuts that work with a connected hardware keyboard, and change them with Plus. On iPad, Keyboard Shortcuts has its own page in the Settings list. See Keyboard shortcuts.
Handedness
Put the buttons you use most under the thumb holding your iPhone or iPad. Right hand is the default and keeps the familiar layout. Choose Left hand and Cleft mirrors the bar at the bottom of your notes and the bar under an open note. Every button keeps its neighbours, and the ones you reach for most sit under your left thumb. On iPhones running versions earlier than iOS 26, the floating capture buttons move to that side instead. The New Note buttons move to that side, and so does Pause while you record. At the top of your notes, Select trades places with the menu button. Cancel and Restart do the same while you record. The buttons above an open note move to that side too. Back and the Notes and Transcript switcher stay where they are. On Mac, Handedness moves only the New Note buttons at the bottom of the sidebar. Handedness follows the hand, not the reading direction, so it reaches the physical edge you chose in right-to-left languages too. The choice applies to this device only.Recording
This page holds your spoken language, the model that transcribes it, and any model you download. It also says where Cleft keeps your audio. Every option keeps your audio and transcripts on your device.Transcription Language
Transcription Language is the one place to choose the language you speak. The list starts with the languages from your device’s Language & Region settings, in your own order, then a divider and every other language. Picking one confirms it straight away, and the picker always shows the language you actually chose.Languages I speak
Languages I speak lists every language you record in. It starts with your transcription language, which stays on while it is in use. Tap any other language to add it, and tap it again to remove it. With two or more languages here, the recording screen offers a language button that lists only these, with every other language under More Languages. With one, the recording screen shows no language button. The list syncs through iCloud to your other devices. Apple Watch records in every language you can choose here. Your iPhone transcribes Watch recordings. See Languages. When a Watch or CarPlay recording falls back from a downloaded Whisper model, it keeps a readable Base transcript on your phone until you open Cleft. Cleft tries the saved model choice once before creating the cloud note. If that model cannot finish, Base remains available and an eligible note offers Improve. Cleft preserves edits you made while it was waiting. For new Watch or CarPlay fallback recordings, Improve asks before replacing saved edits; finish saving your changes first.Model
Model chooses who transcribes your recordings on this device:- Whisper Base (built-in). Included with Cleft, works offline, and needs no download. It is the fallback whenever another choice cannot run.
- Apple Speech (on-device). Apple’s own speech model, on iPhone, iPad, and Mac running version 26 or later with a language your device supports. Choose it and Cleft first checks for language files already on your device. If Apple Speech can use them, it is ready without a download. If it needs more files, Cleft asks before downloading them. Apple Speech transcribes fully on device. Apple Speech can also transcribe while Cleft is in the background; your device may pause the work until you reopen Cleft. Until that download finishes, or if Apple Speech doesn’t transcribe your language, Model shows the model doing the work instead: your downloaded Whisper model, or Whisper Base. Apple Speech’s own status and its Download or Retry button stay underneath, and each button asks before starting. It uses your region’s variant of the language, such as English (Ireland). If you change your region later, the variant you already downloaded keeps transcribing. Chinese always uses Apple’s Mandarin models.
- Whisper Small. An optional download that improves everyday transcripts and works offline once installed.
- Whisper Large v3. An optional download giving the strongest on-device transcription for difficult audio. It uses more storage and memory.
Which model did the work
Under the model you chose, one line names the model that transcribed your last recording. If your choice could not run at that moment, the line says why in plain words and that Whisper Base did the work instead. The reasons it gives include the device running hot, being low on memory, Cleft being in the background, or the download being missing or failing its check. Your choice stays selected for next time. When your model can run by the time you stop, Cleft transcribes the recording again with it before writing the note, and a note that still ended on Whisper Base offers Improve once your model is ready. Your model choice stays set on this device when you sign out or your session expires. The history of which model transcribed your last recording is cleared when you sign out.Downloading a model
Before you download, Cleft shows the download size, the free space needed while it installs, and the space it uses afterwards. Check download verifies an installed model, and Delete removes it.- Keeps going when you leave. On iPhone and iPad, a Whisper Small or Whisper Large v3 download carries on while you use another app or lock your phone. Every file the model needs keeps downloading. If iOS closes Cleft in the meantime, Cleft keeps the finished files. It checks and installs them the next time you open it, without downloading them again.
- Resumes after a dropped connection. A download picks up from where it stopped instead of starting over. It retries on its own, waits while you are offline, and carries on when you are back. When Cleft picks a download up by itself, it waits while Low Data Mode is on. It also waits on mobile data unless you started the download there. A Mac can sleep while a download waits for Wi-Fi, and picks the download up again when it wakes. Whisper Base keeps transcribing meanwhile.
- Says why it failed. When a download cannot finish, Settings names the reason. It might be no connection, a dropped connection, a missing file on the server, a full or locked device, or a failed check. Each one offers Retry. A dropped connection or a locked device clears by itself, so Cleft tries again when you come back. The other reasons wait for you to tap Retry.
- One at a time. Only one model downloads at a time. Choosing a different model, or starting its download, pauses the other one and keeps what it had so far.
Cancel pauses a download and keeps what it has so far. Cancelling never disturbs a model you already have, and switching to a newer model while an older download finishes keeps the choice you made.
Audio Storage
Scroll to the bottom of Recording. Uploading audio and keeping it on your device are separate choices, so you can keep recordings on your device without sending them anywhere.- Upload audio (Plus). Off by default. With Cleft Plus, turn it on to send future recordings to Cleft so they play on your other devices and in shared notes. On the free plan the switch shows a Plus label, and turning it on offers Cleft Plus. Recordings you already made keep the choice they had.
- Keep audio on this device. Keeps each recording on this device so you can play it offline. After Cleft writes the note, it deletes the temporary files it made.
- Stored audio. Shows how much space your recordings use and how many files there are.
- Reclaim Space. Deletes playable audio Cleft is keeping on this device, after you confirm with Delete Local Audio. Uploaded audio stays available online, but recordings that were never uploaded cannot be recovered.
Cleft v1.15.0 turns Upload audio off once on every device, including devices that uploaded audio before the update. If you have Plus and want your recordings on your other devices, turn Upload audio back on. Cleft keeps your choice after that. If your Plus subscription ends, new recordings stay on this device, and uploading resumes for new recordings when you subscribe again.
Writing Style
- Your Rules (Plus). Set one standing instruction Cleft follows every time, up to 500 characters. Free users see example rules to learn from; setting your own is part of Cleft Plus.
- Output Styles. Pick from Structured, Structured Prose, Clean Transcript, and any custom styles you have made.
- Custom styles (Plus). Create up to two named note styles and reorder the full style list.
Sharing
Sharing was called Integrations. A short note at the top says how notes leave Cleft. They go after every recording, automatically or with Send, when you choose Send, or to a folder.- Notion (Plus). Connect, pick a database, and choose how notes flow:
- Auto-send to Notion. Every finished recording lands in your chosen database automatically. Pauses itself after repeated failed sends with a banner that explains how to retry.
- Archive after Send. Move a note to your Archived filter the moment a manual Send to Notion succeeds.
- See Notion for the full setup.
- Local Export. Save notes as Markdown files in a folder you choose, such as an Obsidian vault. Sharing shows whether it is on. Its settings have their own Local Export page.
- Bear and Drafts. Send notes to either app from the note’s Send menu when it is installed.
- Zapier (Plus). Send notes to thousands of apps with Zapier. Create, copy, or replace the API key your Zaps use. See Zapier.
- Webhooks (Plus, Preview). Send each new note to a webhook URL you choose. Save, test, replace, or delete your webhook here. See Webhooks.
- Automatic Copy Format (Plus). Choose how Cleft automatically copies completed notes, including Rich Text in v1.15.0 or later. Manual Copy Rich Text is available to everyone.
- Add “Assisted with Cleft”. Ends copied notes with an “Assisted with Cleft” line. It is always on with Basic; Plus can turn it off.
- Request an Integration. The last row. Tell us which app you want Cleft to connect to next.
Local Export
- Save notes as files. Export notes as Markdown on Mac, iPhone, and iPad.
- Export mode. Choose Automatic export to keep every note exported automatically, or Manual export to save only the notes you choose with Send → Send to Folder.
- Archive after send. On Manual export, move a note out of your active library once its export succeeds.
- Export Folder. Free users use Cleft’s own Cleft Notes folder. Plus users can choose a custom folder, including an Obsidian vault, NotePlan project, Logseq graph, or another Files/Finder location.
- Save audio files. Save the original
.m4arecording beside the Markdown file. - Frontmatter. Start with Everything, Obsidian, NotePlan, Logseq, or Drafts, then choose which fields Cleft writes, rename optional fields, move the transcript into the note body, or add fixed fields of your own.
- Save existing notes as files. Export notes that already existed before Local Export was enabled.
- Show path. On iPhone and iPad, reveal the current path so you can navigate to it in Files.
Keyboard Shortcuts (iPad)
On iPad, Keyboard Shortcuts is its own page in the Settings list. On iPhone it stays under General. See Keyboard shortcuts.Siri & Shortcuts
Lists every phrase Siri knows for Cleft, grouped by what it does: Record, Write, Find Your Notes, and Share and Organize. The Shortcuts button at the top opens Cleft’s actions in Apple’s Shortcuts app. Cleft cannot read phrases you record yourself, so the page lists only the phrases Cleft provides.Widgets
- Lock Screen widgets. Add quick recording entry points to the Lock Screen.
- Home Screen widgets. Start a new note, continue the last note, or pin a specific note for append workflows.
- Live Activity and Control Center. Configure recording surfaces that work outside the app.
- Action Button and CarPlay guidance on iPhone. Follow setup steps for the system features that live outside Cleft.
Communication Preferences
The current production build has no Communication Preferences setting. This guide is ready for its release.
- Get more from Cleft Notes. Practical tips, a useful monthly roundup, and news about meaningful improvements.
- Save on Cleft Notes. Relevant offers and ways to get more from your plan.
- Help shape Cleft Notes. Occasional feedback and research invitations that help improve Cleft Notes.
Account, security, billing, and service messages are necessary communications, so they are not controlled here.After you save, Cleft may say your choice is saved but email delivery is still pending. That is honest rather than broken: the change is recorded, and Cleft waits until the email provider confirms it rather than claiming it took effect immediately. A company-wide unsubscribe can also still prevent delivery.
Privacy
The Privacy page shows what Cleft collects and lets you decide, on this device, whether it collects anything at all.- Nothing by default. With both switches off, no usage tool and no crash reporter runs, and Cleft holds no per-install ID.
- Share how you use Cleft. Off by default. Turn it on to send bounded feature-use and failure counts. Cleft creates a fresh random ID for this installation when you do. The ID is not linked to your Cleft account and contains no name, email address, or account ID.
- Add crash and error reports. Off by default, and it needs Share how you use Cleft on. Turn it on to attach that same random ID to technical crash details, so one problem can be followed across sessions.
- Hide display name, Hide email, and Hide user ID. On by default. They hide these details on the Account page, so a screenshot or a shared screen shows nothing private. Turn one off to show that detail. Each choice applies only to this device.
- Learn More. Opens Privacy & Trust, including what Cleft never sends: your notes, transcripts, audio, filenames, email address, and Cleft account ID, whichever way you set the switches.
Account
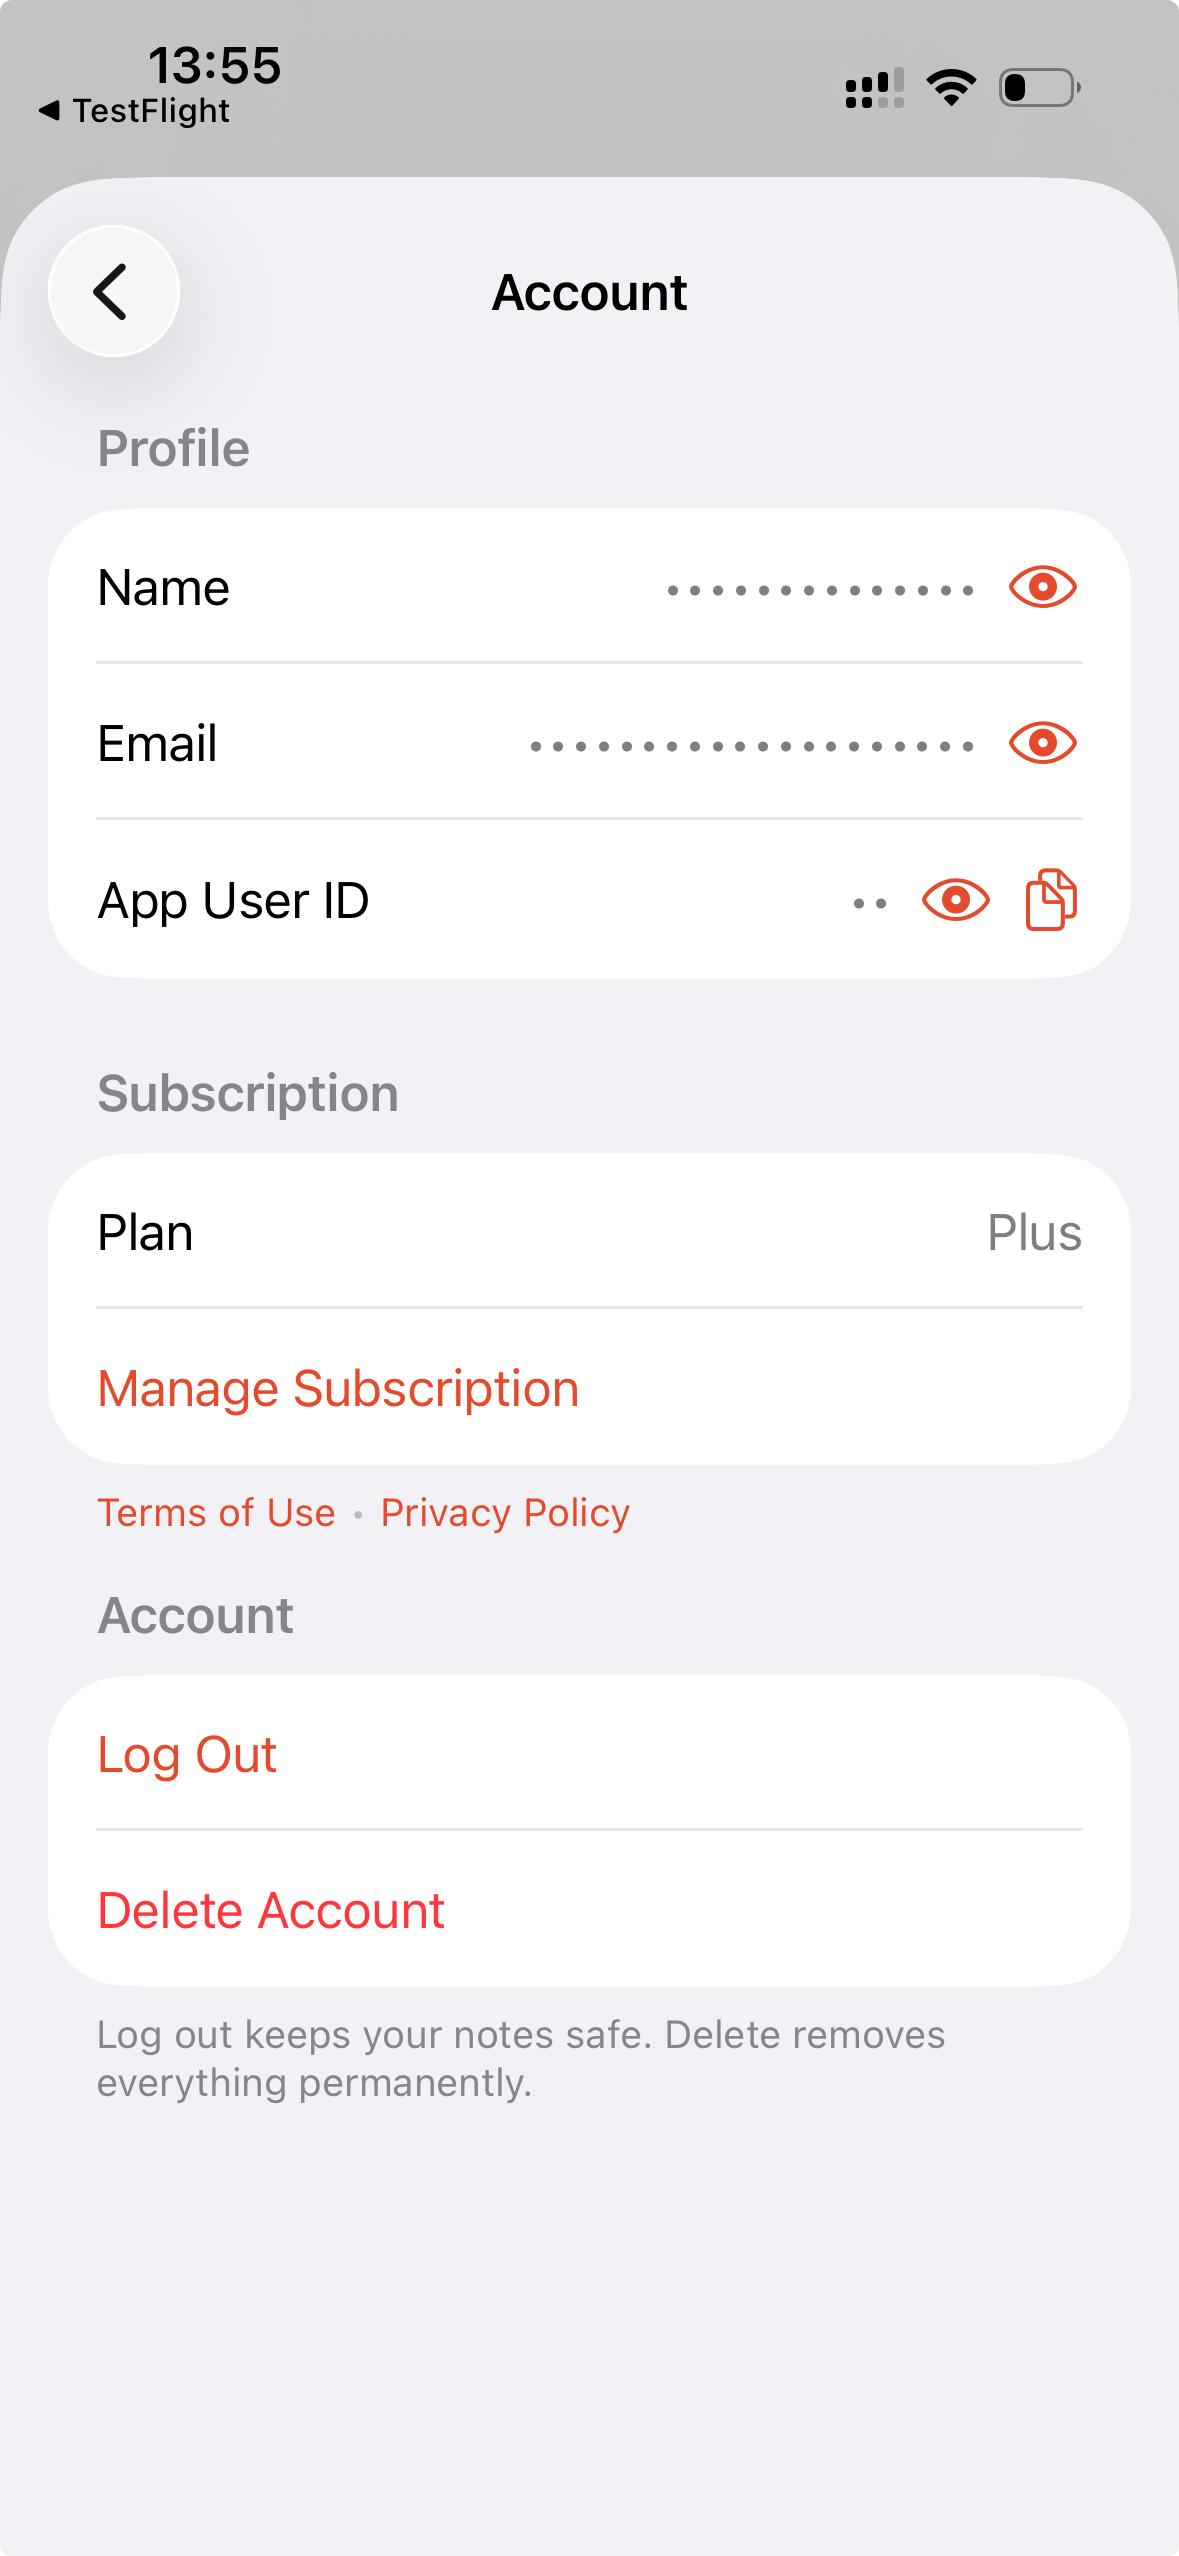
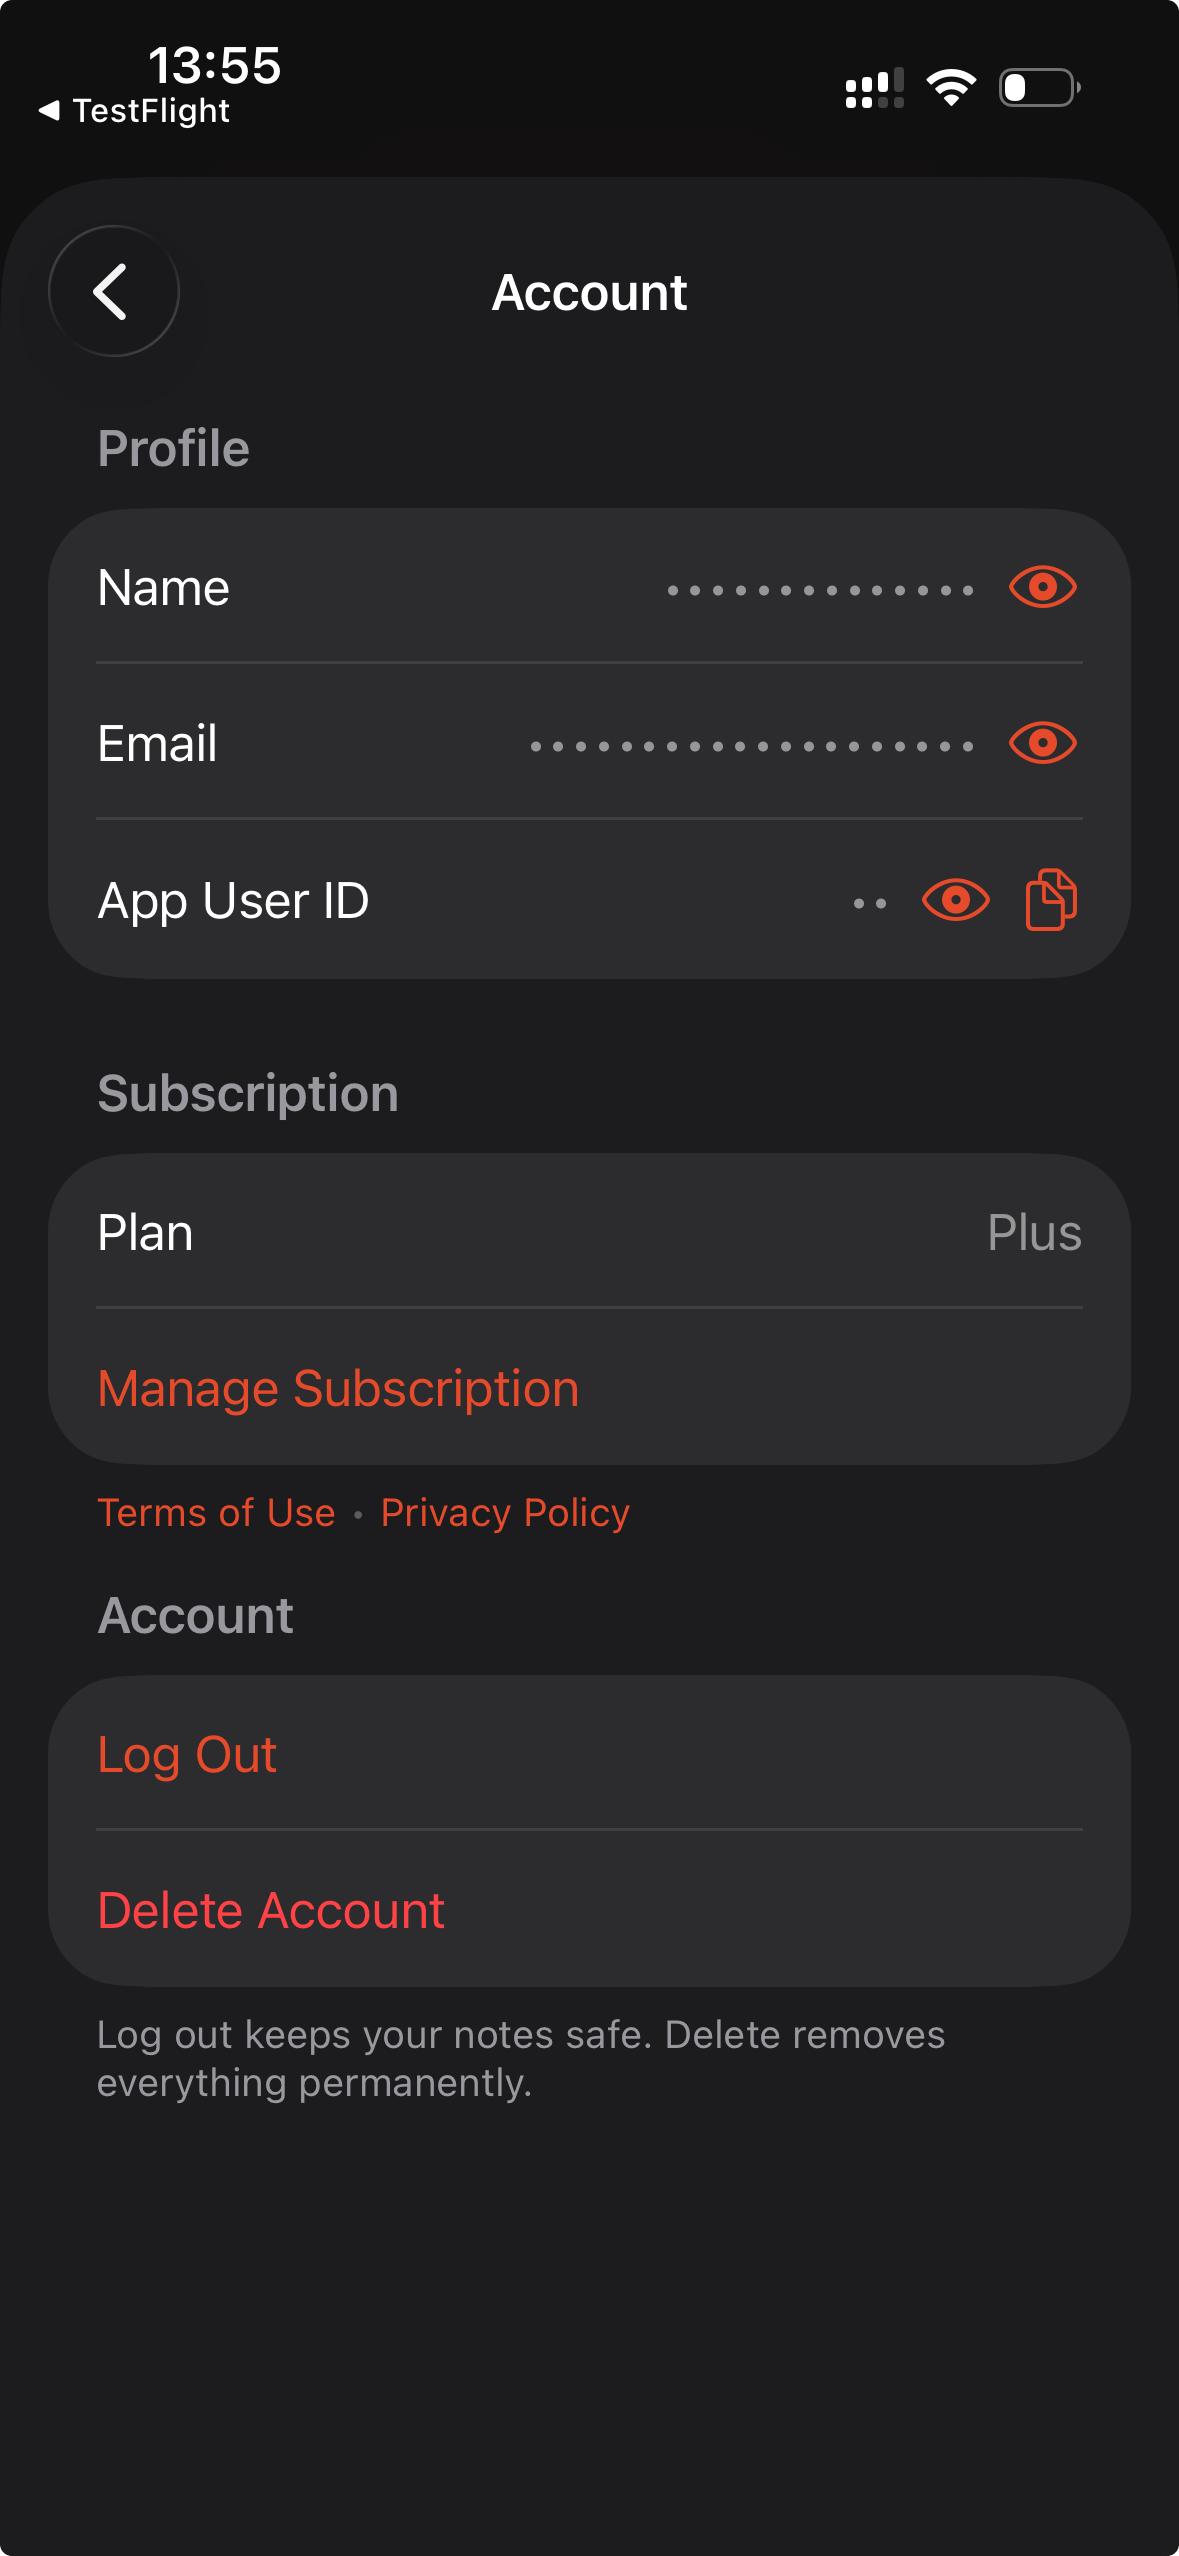
iPhone Account settings
- Profile. Your Name, Email, and App User ID. They stay hidden while the matching switch in Privacy is on. Copy your App User ID to share it with support without showing your email on screen.
- Subscription. Shows Basic or Plus. Upgrade to Plus compares the plans; with Plus, Manage Subscription handles billing.
- Your notes. Totals your Notes, Words captured, and Time recorded on this device. Cleft counts them from the active notes saved on this device, so they can be lower than your full library. Archived notes are left out, and the totals never leave your device. To see one recording’s length and where its audio lives, open Details from the note’s ••• menu.
- Actions: Log Out. Sign out of Cleft. Synced notes stay safe, but signing out deletes notes on this device that have not finished syncing.
- Delete Account. Close your account, starting with a copy of your notes. See Close your account.
Change your name
Tap Name, type the name you want, and choose Save. Cleft shows Updated, and your transcription language stays exactly as it was. The name is optional and matters only for notes you choose to share. The first time you share a link, Cleft asks which public name or pseudonym to show, starting from this name, and you can leave it empty. See The name on your link. To change your email, tap Email, enter the new address, and type the verification code Cleft sends you.Close your account
Delete Account walks you through closing your account in order, and nothing is removed until you confirm at the end.- Keep a copy of your notes. Choose Make a copy and Cleft builds a readable copy of your notes, summaries, transcripts, tags, and dates on this device, then asks where to keep it. The copy includes a manifest listing what it holds, what your account holds none of, and anything kept under a policy. Or choose Skip this. Cleft waits until you save the copy or skip it. If the copy cannot be made, check your connection and let unfinished notes sync, then try again.
- Optional choices. You can say why you are leaving and turn on Also stop optional Cleft Notes emails. Both start off, and closing works the same either way. If you ask to stop emails, Cleft says it asked to unsubscribe you, because it cannot confirm from your device when that is done.
- Before you close. Cleft keeps three things apart: your account and its notes are removed for good, optional email preferences are separate, and closing does not cancel an App Store subscription. Cancel that in the App Store.
- Confirm. Choose Delete account permanently. Progress appears at once and says which is true: your account is closed and cleanup is still running, or your account is closed and cleanup finished. When cleanup finishes, Cleft emails your account address to confirm, with a reference support can look up if you ever need to ask about it.
Closing your account is permanent. Save the copy of your notes before you confirm if you might want them later.
Help & Support
- User Guide. Opens this guide inside Cleft, even offline. Pages open at the topic you asked about, search covers every page, and related pages link to each other. Common questions opens the FAQ.
- Report a problem. Builds a report you can read before you send it. See Report a problem below.
- Send Feedback, Email Us, and Leave a Review. Share ideas, write to the team, or leave an App Store review.
- Privacy Policy and Terms of Service. Open the legal documents.
Report a problem
Cleft writes a plain text file and hands it to you. Nothing goes anywhere on its own, and you pick who reads it.- What stays in the file. Cleft does not collect your notes, transcripts, recordings, or attachments for the report. Text you type or paste stays in the file, except for recognised sensitive patterns, so read the preview under What this report contains and remove anything you do not want to share.
- A temporary code, if you want one. Include a temporary code for this report (7 days) adds a code support can quote back to you. Cleft does not attach it to diagnostic events, and your privacy choices stay unchanged.
- Withdraw later. Reopen Report a problem to withdraw what this device kept for a report. A file you already sent or saved stays where you sent it.
About
Your version and whether an update is ready, plus Rate Cleft, What’s New, the website, Cleft on X, and the legal links. Tap the version to copy it for support.macOS Settings
On Mac, Settings uses a sidebar with the same pages in the same order. Open the window with⌘,, then choose the page you need. Text wraps to the width of the window, so a wider window shows longer lines.
General
- Theme. Light, Dark, or Match System.
- Note view labels. The Notes and Transcript switcher shows Icons only by default. Choose Icons + labels to add its labels. Cleft still simplifies the note toolbar when space is tight.
- Handedness. Right hand or Left hand moves the New Note buttons at the bottom of the sidebar to that side. See Handedness.
- App Icon. With Plus, choose a colour for the Cleft icon in the Dock. The Mac shows it only while Cleft is open, and Finder and Launchpad keep the Cleft icon. Your Mac remembers the choice the next time you open Cleft.
- Launch at Startup. Start Cleft when your Mac starts.
- Date and time format. Choose how dates and times appear throughout the app.
Recording
- Transcription Language. The one place to choose the language you speak. Languages from System Settings → General → Language & Region come first, in your own order.
- Languages I speak. Click Choose to tick every language you record in. With two or more, the recording window offers a language menu with only those.
- Model. Choose Whisper Base (built-in), Apple Speech (on-device), Whisper Small, or Whisper Large v3. Apple Speech needs macOS 26 or later and a language your Mac supports, and it isn’t listed on a Mac that can’t run it. Download, check, or delete the Whisper models here.
- Which model did the work. A line under your choice names the model that transcribed your last recording, and says why if Whisper Base had to step in.
- Input Device. Select your microphone.
- Output Device. Select audio output for playback.
Audio Storage
At the bottom of Recording:- Upload audio (Plus). Off by default, so new recordings stay on this Mac. With Cleft Plus, turn it on to send future recordings to Cleft for playback on your other devices and in shared notes.
- Keep audio on this device. Keeps each recording on this device so you can play it offline.
- Stored audio and Reclaim Space. See what your recordings use, and delete the local copies when you need the space back.
Sharing
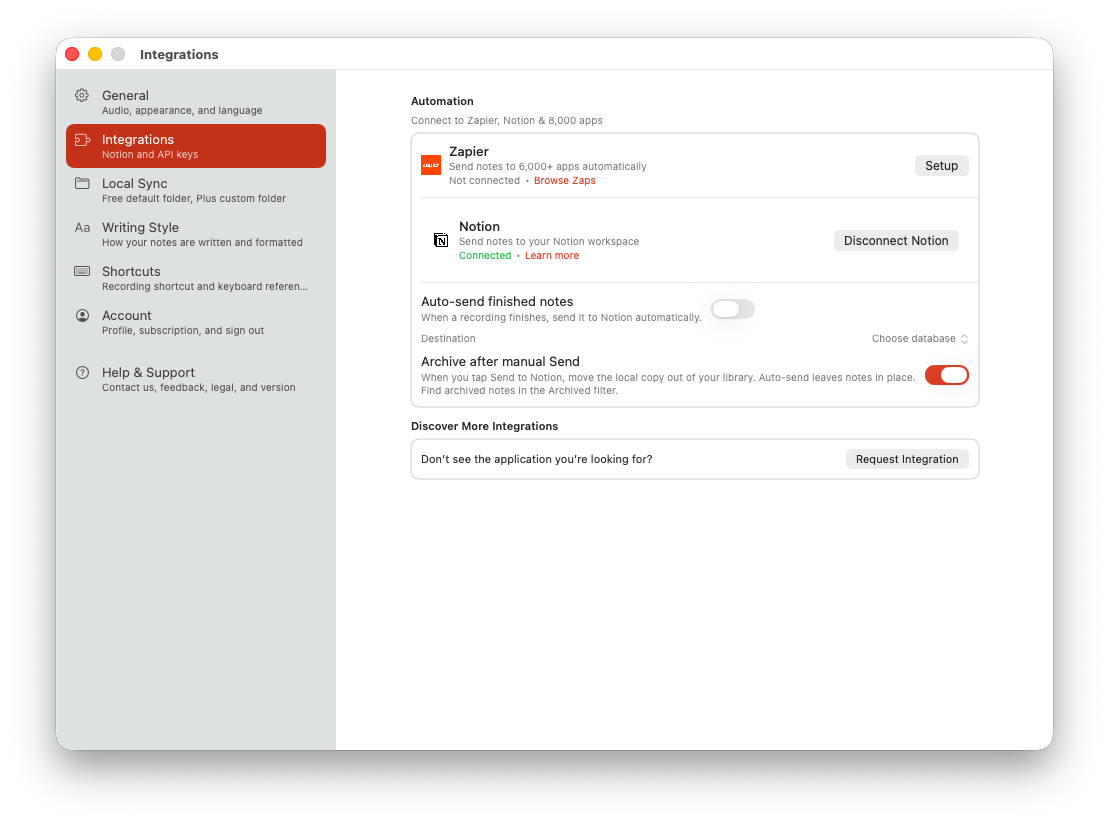
macOS Integrations settings
- Notion (Plus). Connect, pick a database, configure auto-send, and choose whether successful manual sends archive notes.
- Zapier (Plus). Send notes to thousands of apps with Zapier, using an API key you create here.
- Webhooks (Plus, Preview). Send each new note to a webhook URL you choose. See Webhooks.
- Copy Format (Plus) and Cleft Signature. How Cleft copies a note automatically, moved here from Writing Style.
- Request an Integration. The last row. Tell us which app you want Cleft to connect to next.
Local Export
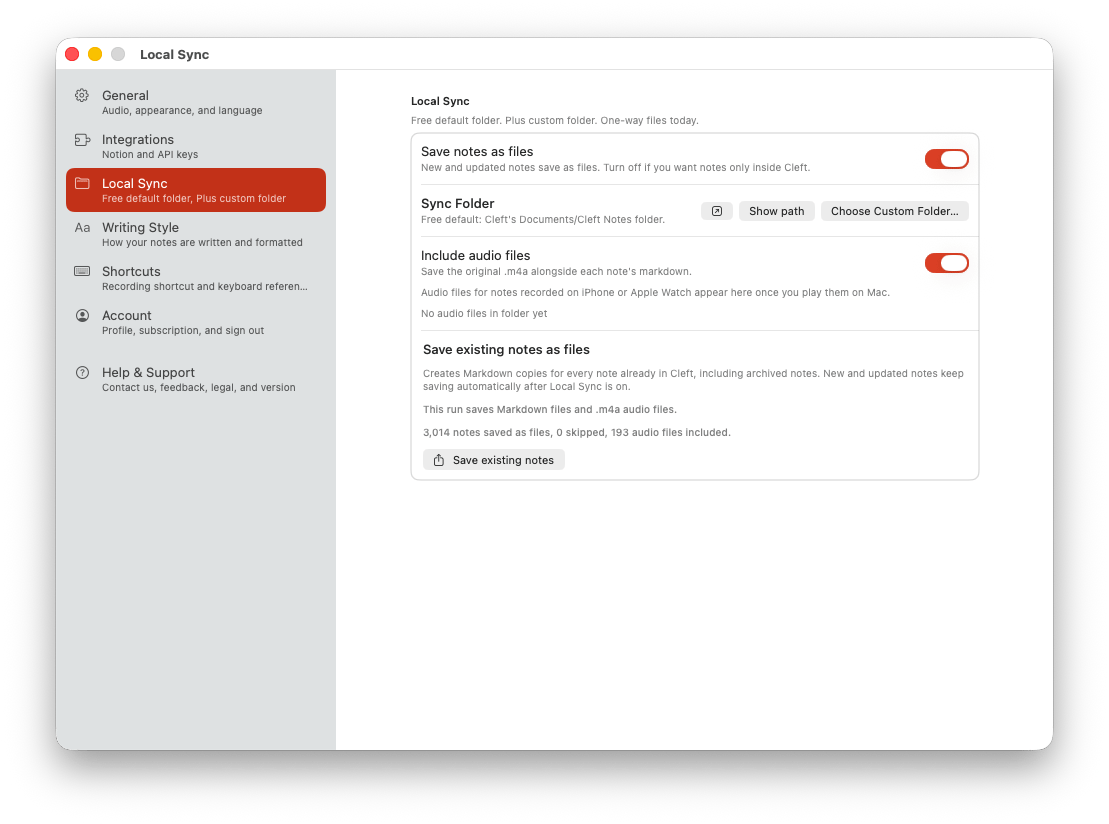
macOS Local Export settings
- Save notes as files. Auto-export every note as Markdown.
- Export Folder. Free users use Cleft’s own Cleft Notes folder. Plus users can pick a custom folder.
- Show in Finder and Show path. Open the active folder in Finder or check the exact path, whether you use the default folder or a custom destination.
- Save audio files. Save original
.m4arecordings beside Markdown exports and see the current audio footprint. - Frontmatter. Choose a starting point, customize the fields Cleft writes, preview the result, and optionally rewrite existing files. See Customize the frontmatter.
- Save existing notes as files. Backfill notes that existed before Local Export was enabled. If you switch Local Export off during a save, its progress and Cancel button stay available until the save finishes. The result stays visible afterwards, including failures and partial saves. An open frontmatter editor or vault rewrite also stays open.
Writing Style
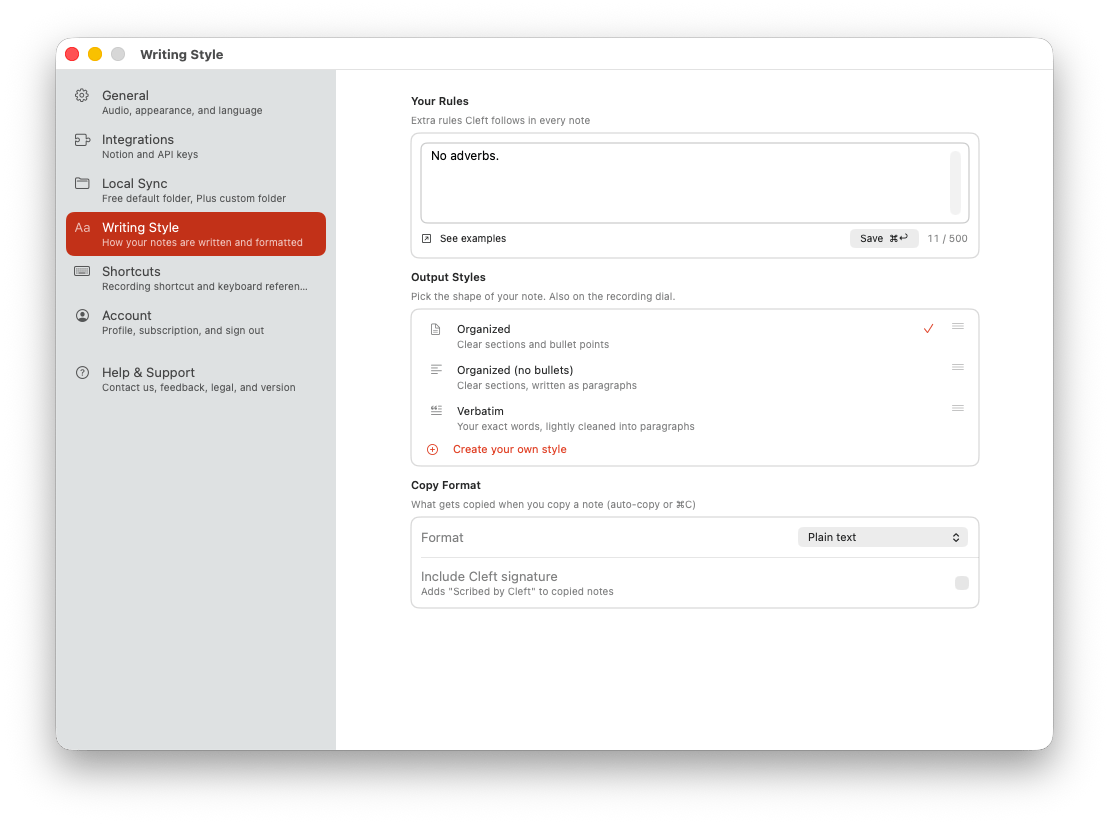
macOS Writing Style settings
- Your Rules. Add one standing instruction for Cleft to follow.
- Output Styles. Choose, create, and reorder note styles.
Keyboard Shortcuts
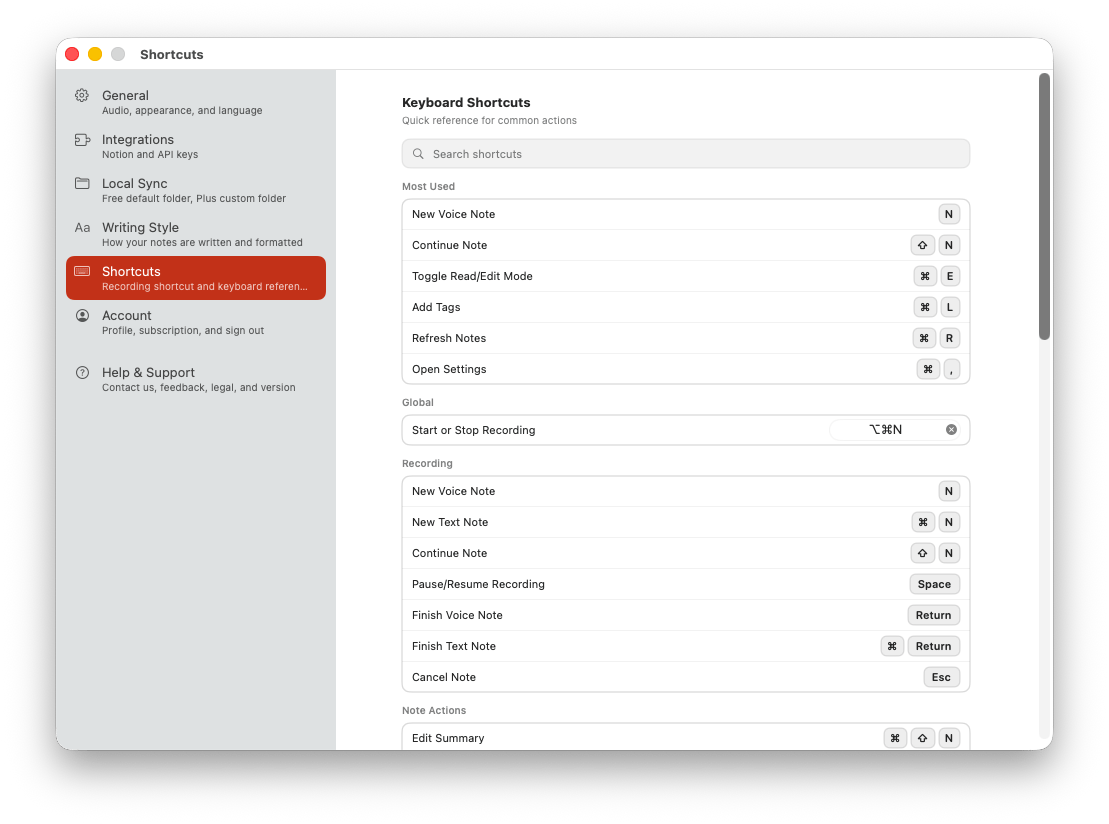
macOS Shortcuts settings
- Global Start or Stop Recording. The default shortcut is
⌥⌘N; rebind it or clear it here. - Searchable shortcut reference. Find recording, editing, navigation, and sharing shortcuts from one place.
- Most Used. Keep the shortcuts you reach for most visible while you learn the set.
Agent Access
Let an AI app you already use read and search your notes, without permission to change or share them. Pick your app, and Cleft shows only that app’s setup: one button for Claude Desktop, and one command or one block of configuration for the others. Read from your Local Export folder, or with Cleft Plus from your account library without exporting anything first. When you stop using an app, the pane names the exact steps to disconnect it. See Agent Access for each app’s setup.Siri & Shortcuts
The phrases Siri knows for Cleft on your Mac, grouped by what they do. See Siri & Shortcuts above.Privacy
The same diagnostics switches, account-detail switches, and Learn More link described under Privacy above. Email preferences will open from here once Cleft turns them on. See Communication Preferences above.Account
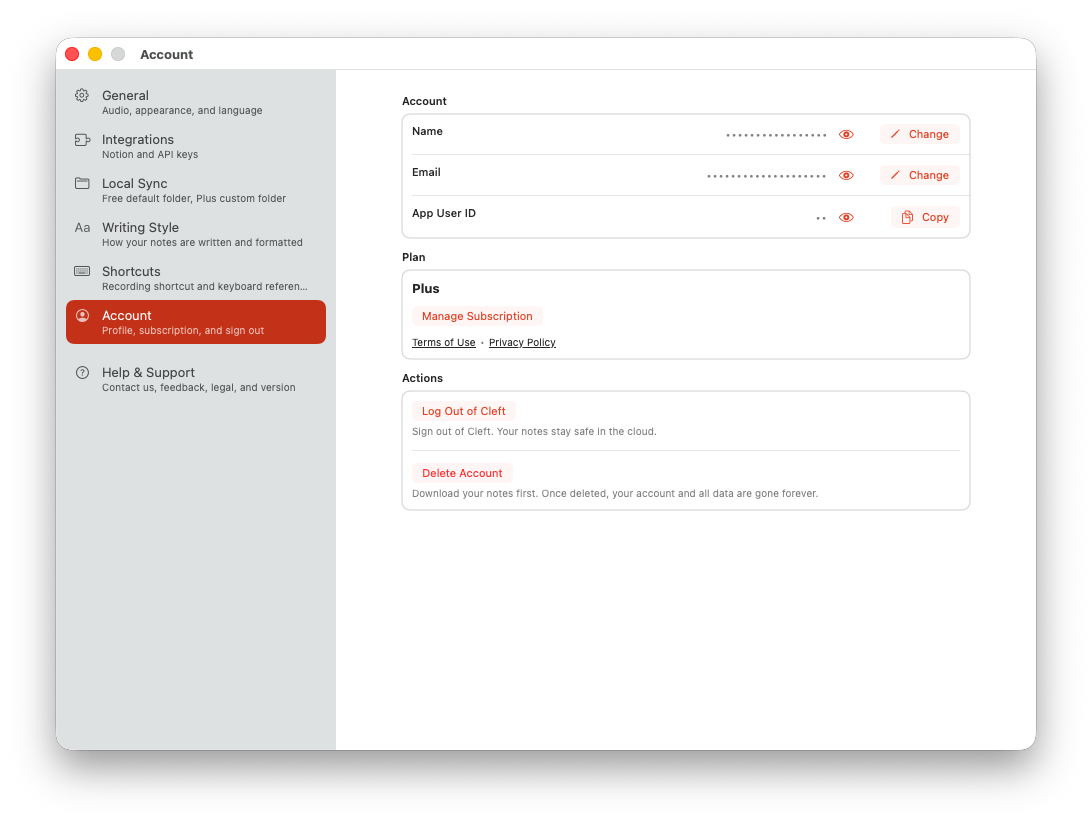
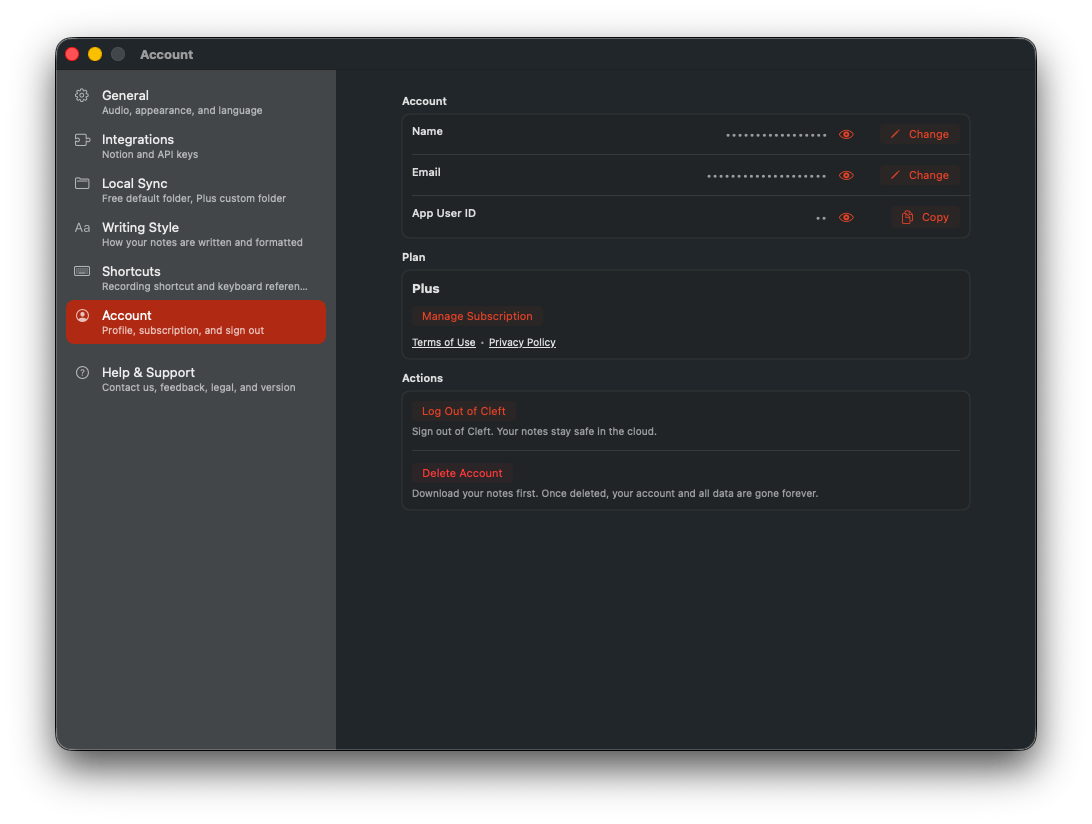
macOS Account settings
- Profile. Your name, email, and App User ID, hidden while the matching switches in Privacy are on.
- Copy App User ID. Share your support ID with Cleft without showing your email on screen.
- Change. Choose Change beside your name, type the new one, and choose Save. Your transcription language stays as it was.
- Subscription. Current plan, with Upgrade to Plus or Manage Subscription.
- Your notes. Totals your Notes, Words captured, and Time recorded on this device, counted from the active notes saved on this Mac. Archived notes are left out, and the totals never leave your Mac. Details shows each recording’s length and where its audio lives.
- Actions: Log Out. Sign out. Synced notes stay safe, but signing out deletes notes on this Mac that have not finished syncing.
- Delete Account. Close your account in the same steps as on iPhone, starting with a copy of your notes. See Close your account.
Help & Support
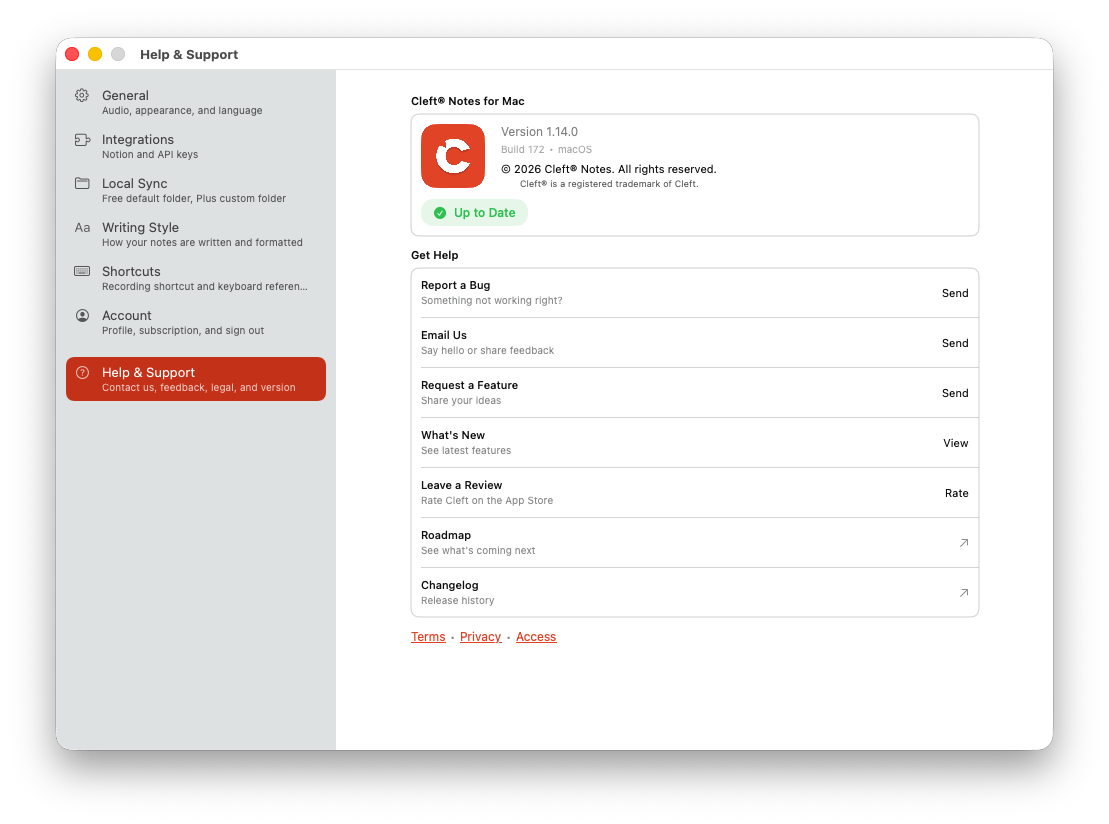
macOS Help & Support settings
- Help. Report a problem builds a report you can read before you send it (see Report a problem). Report a Bug gets in touch, and the User Guide and Common questions links come last.
- Feedback. Email Us, Request a Feature, and Leave a Review.
About
The app version, build, and update status, then Releases: What’s New, Changelog, and Roadmap. The Terms, Privacy, and Access links sit at the bottom of the page. Click the version to copy it for support. The user guide lives in the Help menu. Choose User Guide or press⌘? to read it inside Cleft, even offline. Getting Started, FAQ, and Cookbook open their pages directly.
Platform Differences
For folder export setup, file naming, and app-specific workflows, use the Local Export guide.