The Obsidian integration is a Plus feature and currently only available on macOS. Upgrade to Plus to sync your notes with Obsidian. If you create a note on mobile, please add to it or regenerate on desktop to make it sync across.
Requirements
- Front Matter Title Plugin installed in Obsidian
Setup Guide
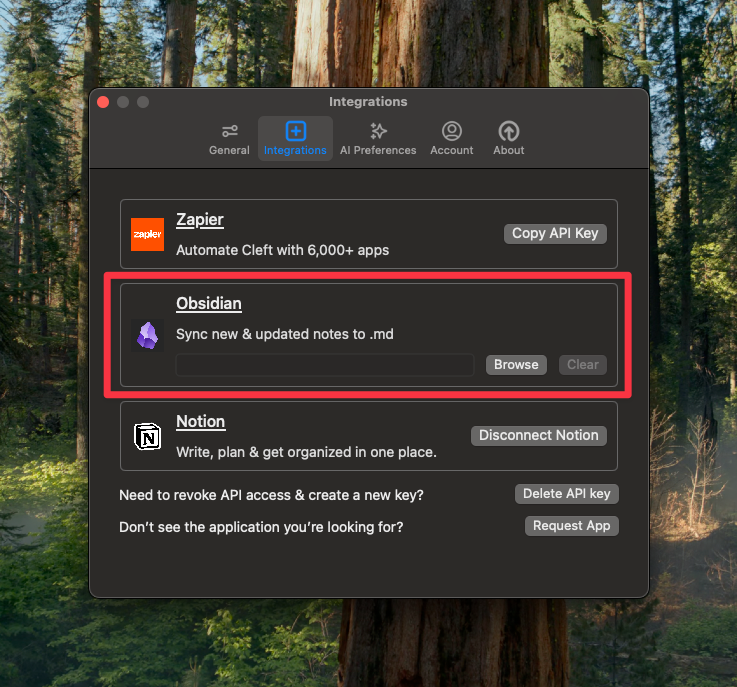
Open Cleft Settings and Connect
-
Open Cleft Settings (press
⌘ + ,or click the gear icon) - Go to the “Integrations” tab
- Click “Connect to Obsidian”
-
You’ll be prompted to select your Obsidian vault
Select Your Obsidian Vault Folder
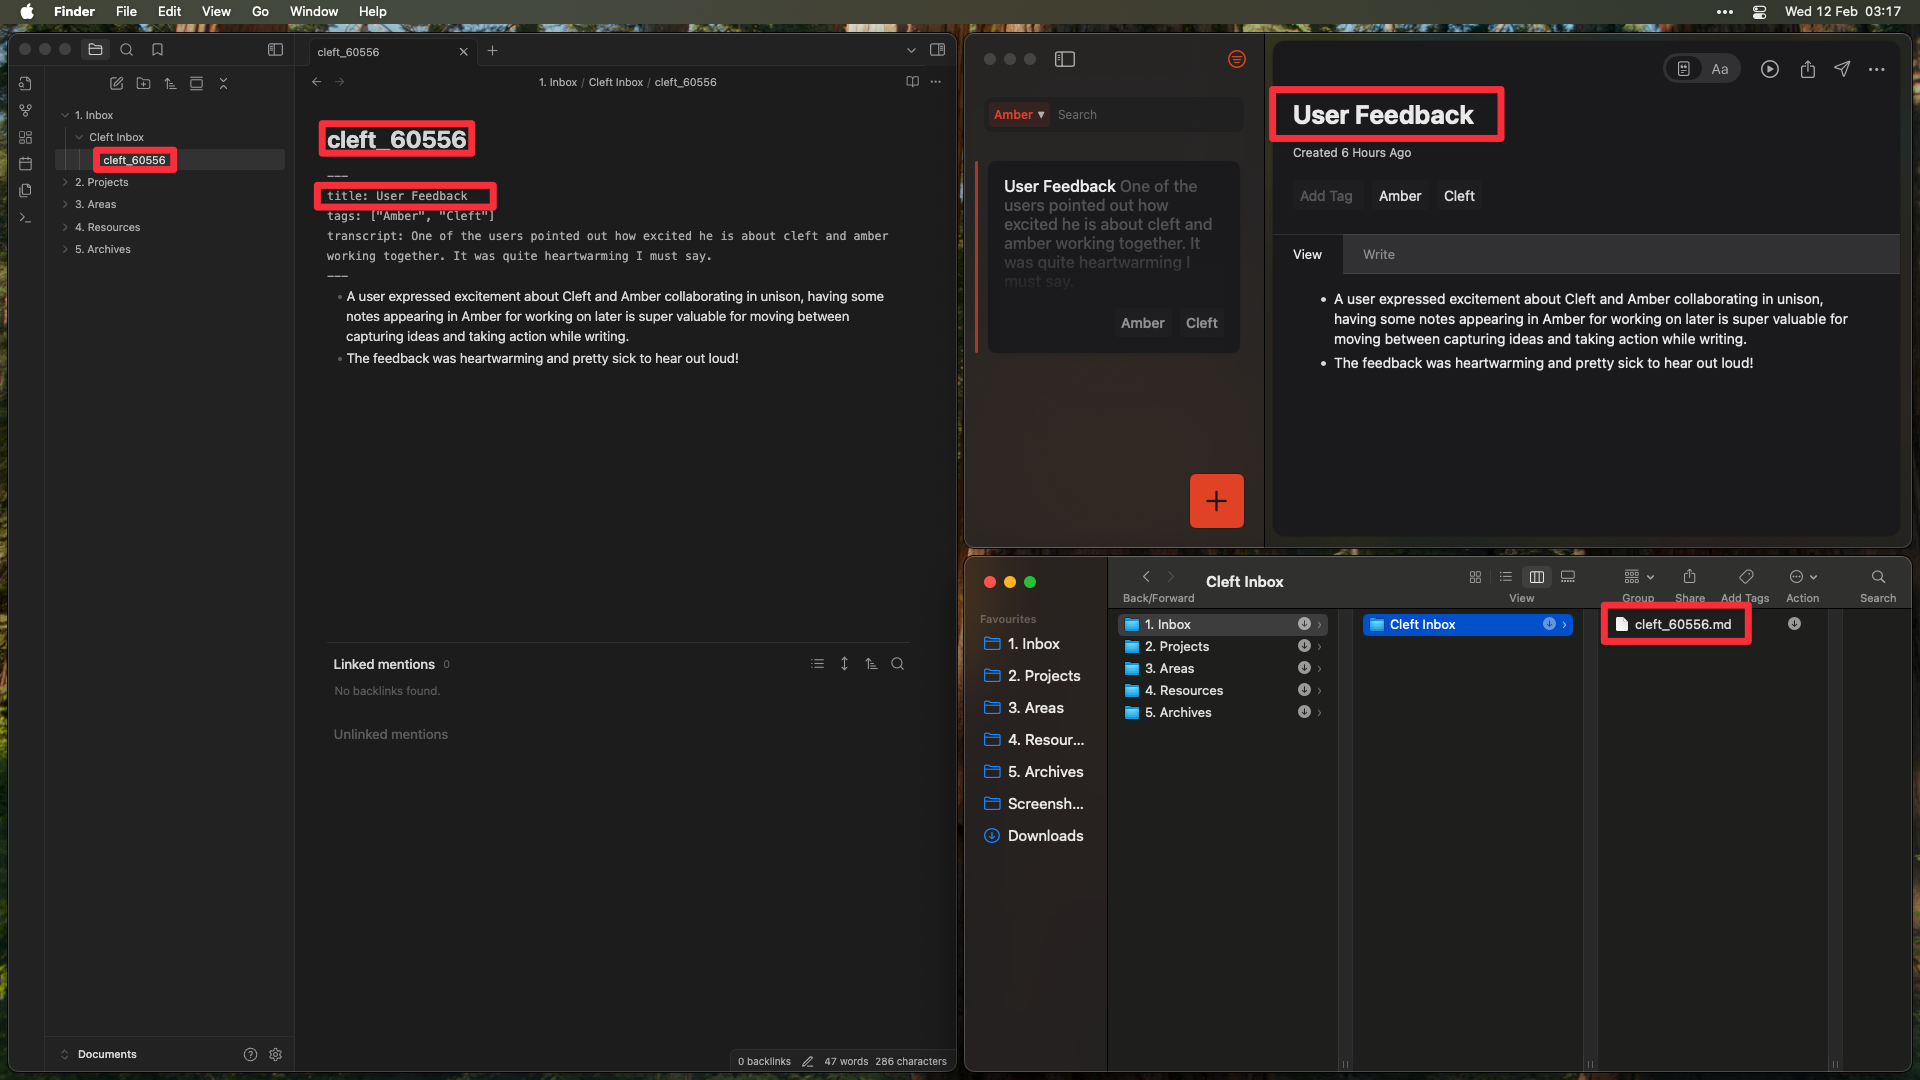
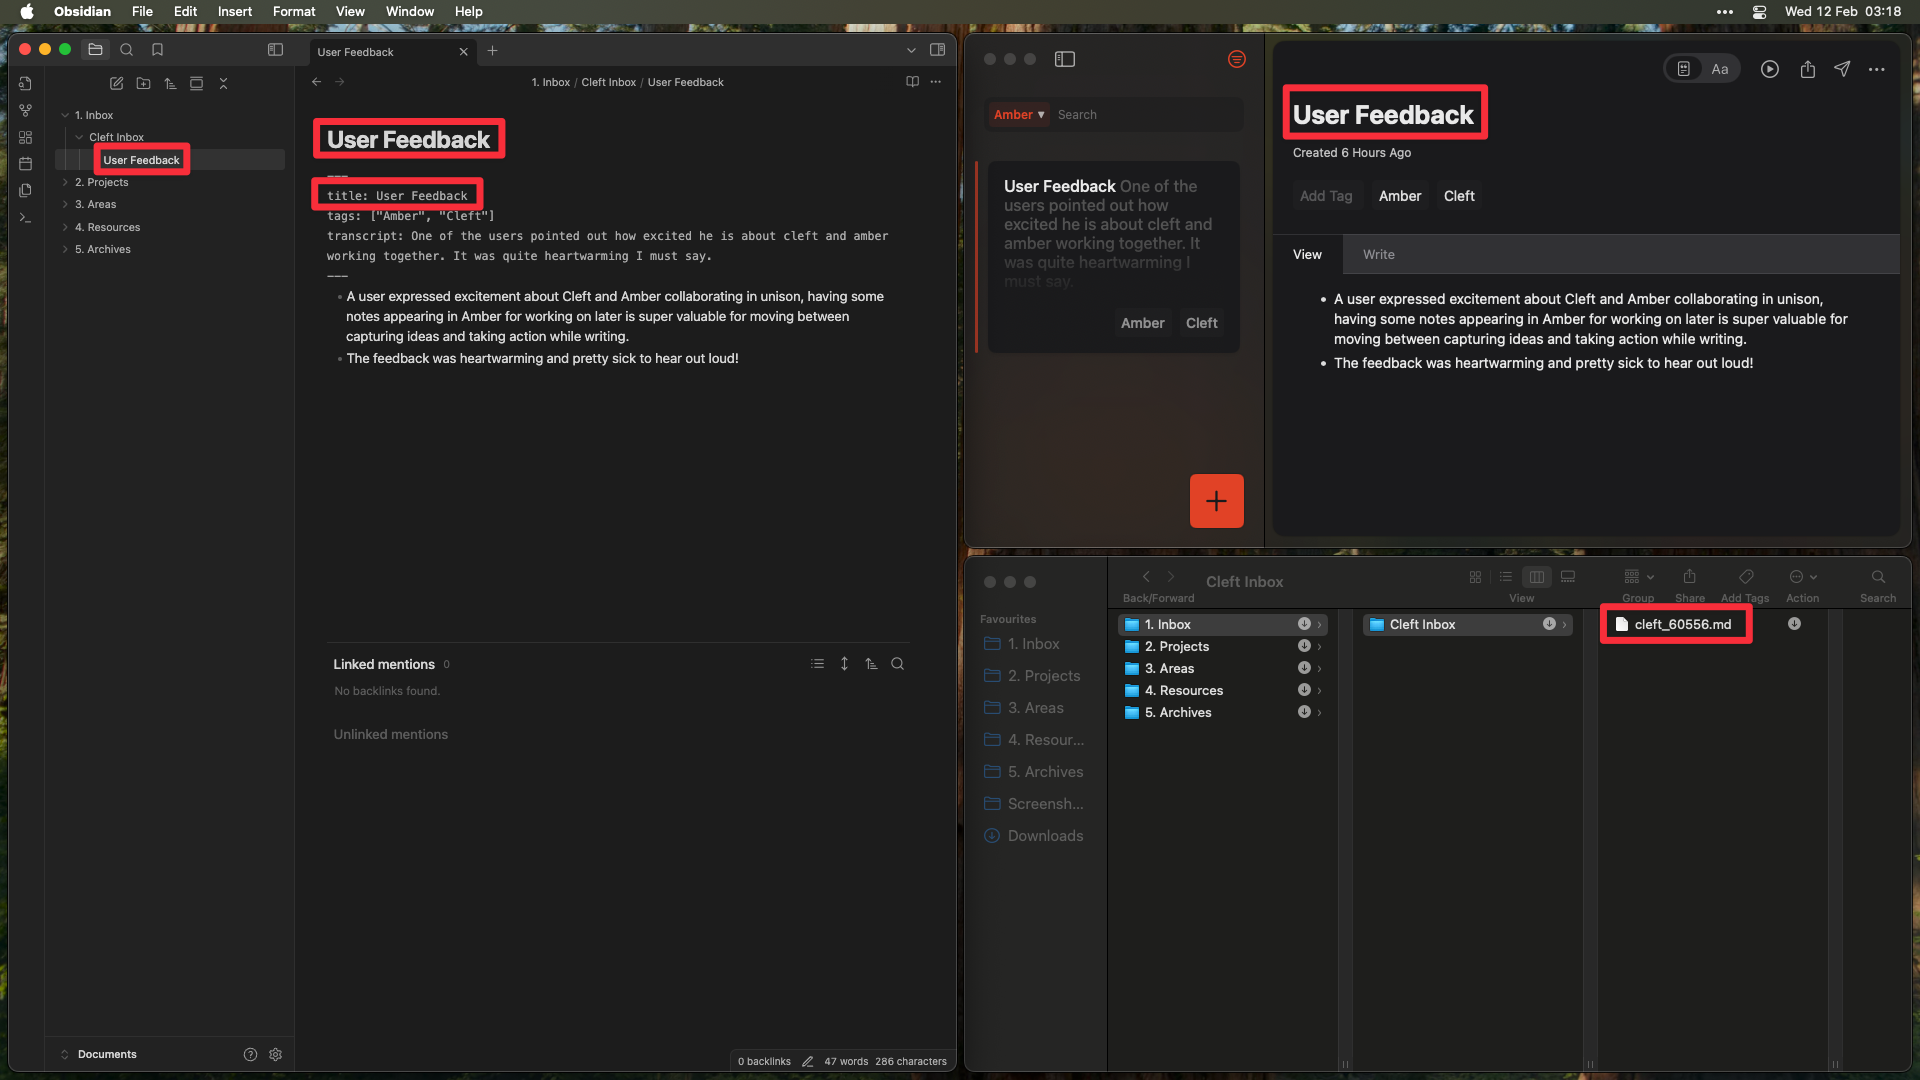
Select where your Cleft notes will be saved as markdown files in your Obsidian vault: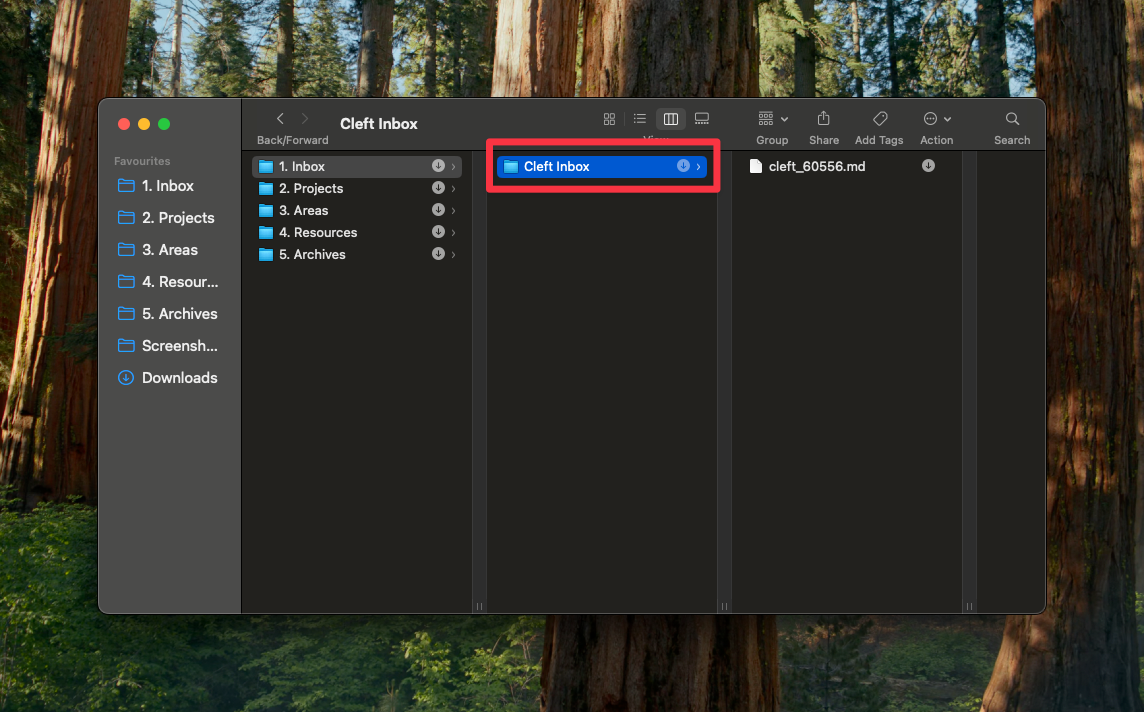
- Create a dedicated folder for your Cleft notes (e.g., “Cleft”, “Voice Notes”, “Cleft Notes”, or “Inbox”)
- This folder will contain all your Cleft notes synced as .md files
- Select this folder when connecting Cleft to Obsidian
Cleft uses one-way sync: changes made in Cleft will sync to Obsidian, but changes made in Obsidian will not sync back to Cleft. Audio recordings stay in Cleft - only the transcribed text syncs to Obsidian.
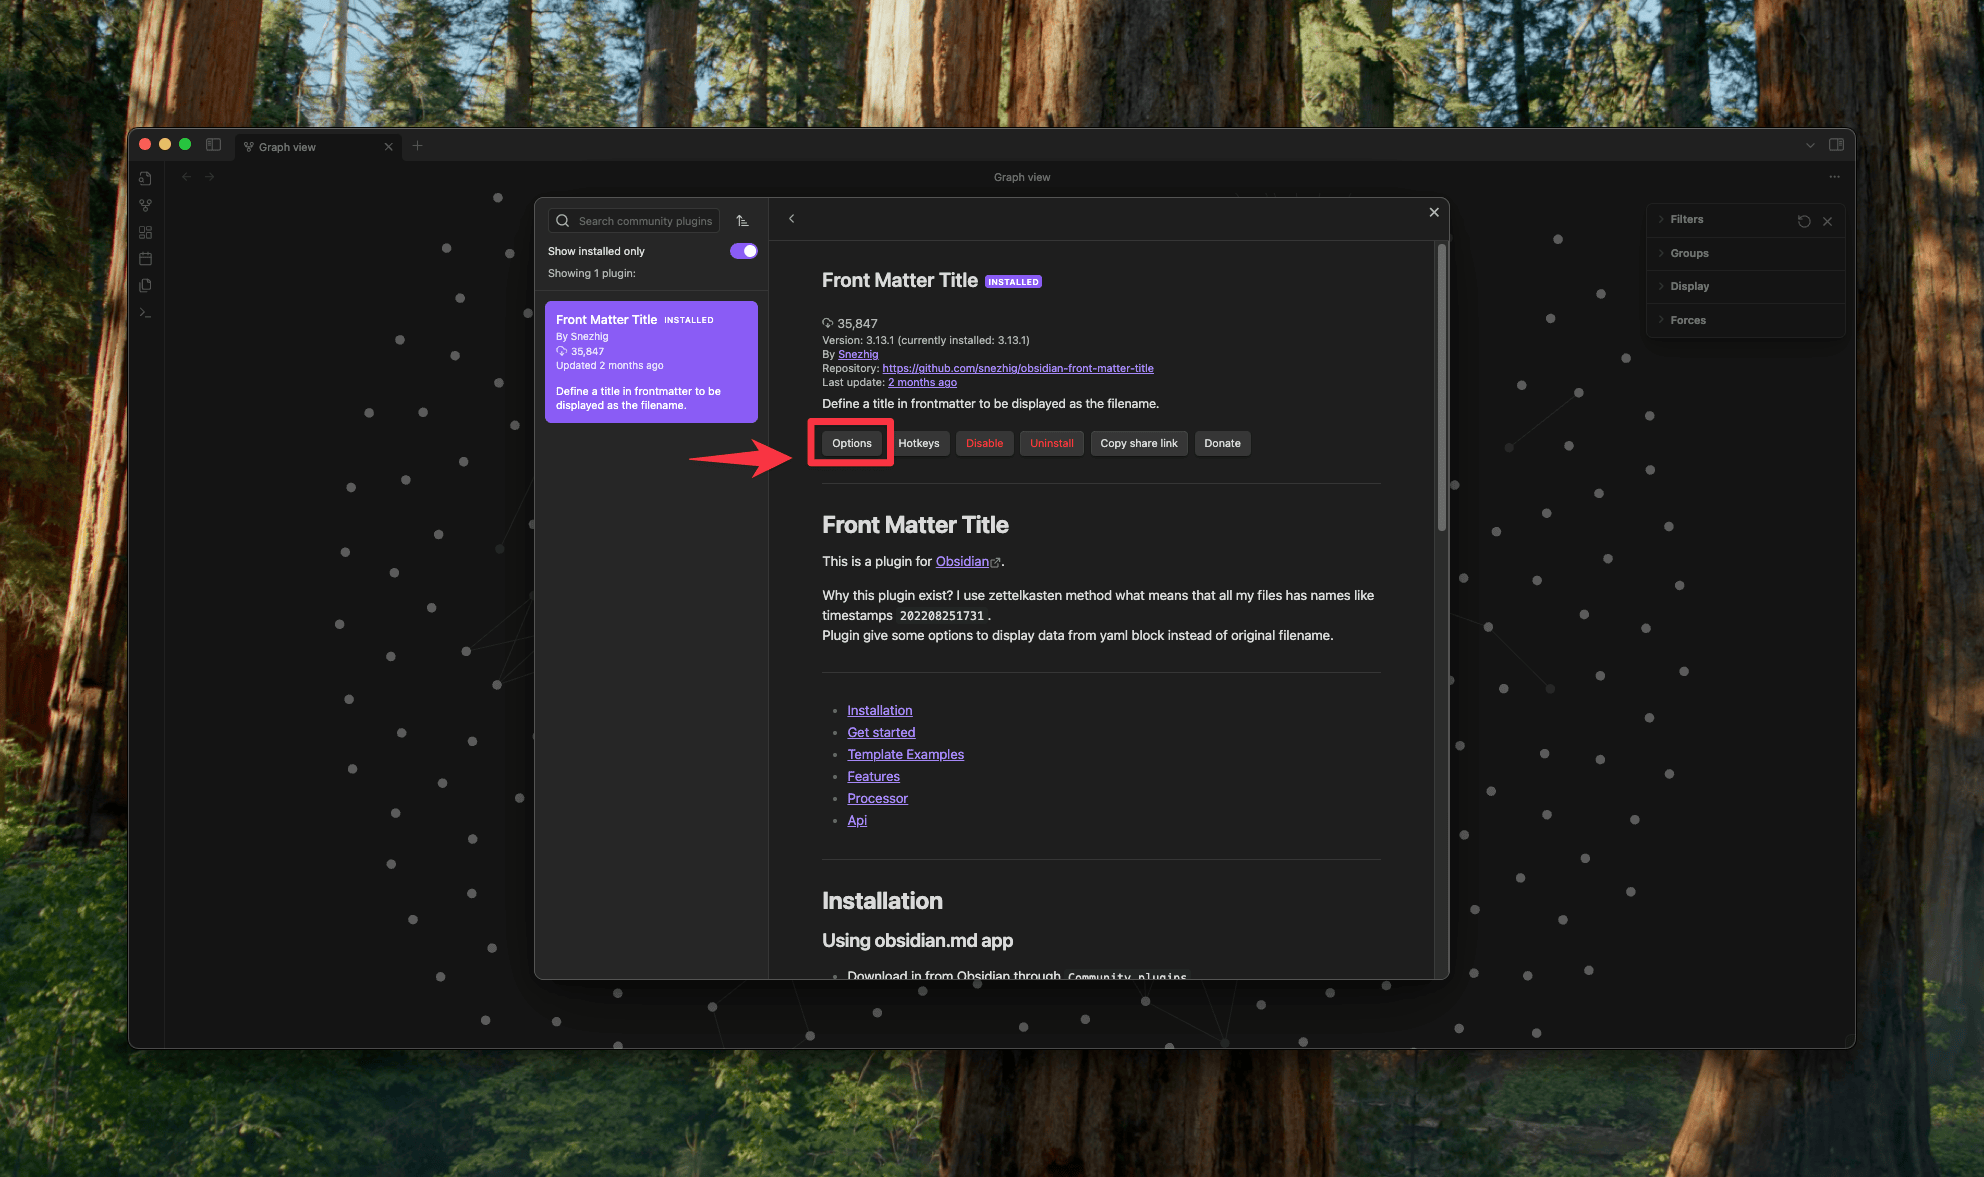
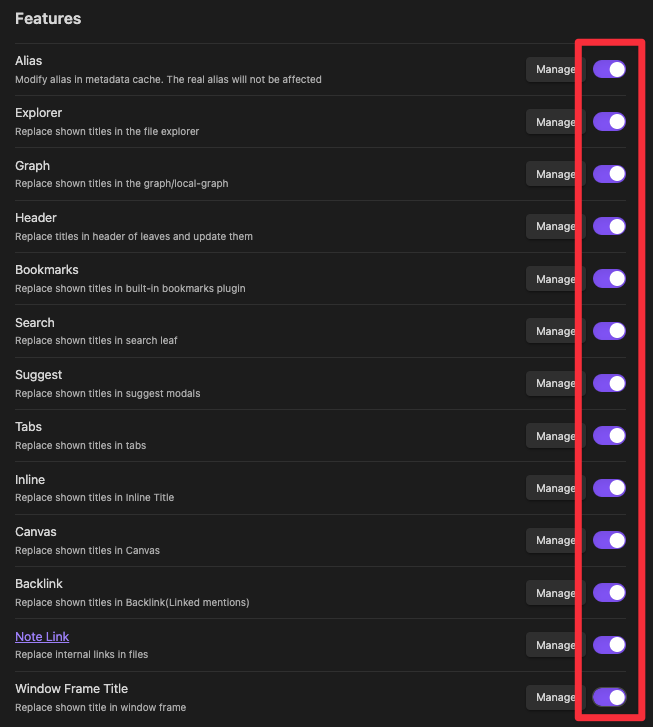
Install Front Matter Title Plugin
Install the Front Matter Title plugin from Obsidian’s community plugins: